Venezuelan Pabellón Criollo

Venezuelan Pabellón Criollo

Venezuelan
Pabellón Criollo

National Dish for any Occasion

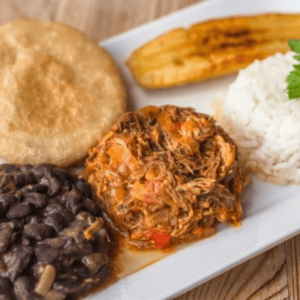
There is literally no family or community event without Pabellón Criollo. The juicy meat is really easy to prepare, just takes a bit of patience.

You can get creative with the combinations of sides and toppings. If you can find plantain, don’t miss to add a side of this fried sweet goodness.

Pabellón Criollo Spice Blend
Annatto, cumin, lime and orange peel, paprika, oregano
Venezuelan Pabellón Criollo

Share

More South American Recipes

The current query has no posts. Please make sure you have published items matching your query.

Short Recipes & Tips for Sides & Sauces

Guasacaca

 Ingredients

  • 1 avocado
  • 1/2 green bell pepper
  • 1 medium onion
  • 1 bunch cilantro
  • 1 bunch parsley
  • 3 cloves garlic or more to taste
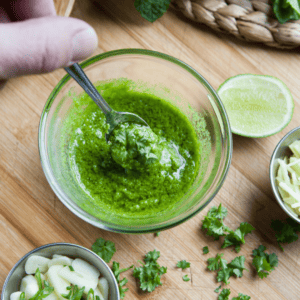
Venezuelan Guasacaca

 Directions

  • Roughly cut all Guasacaca ingredients.
  • Blend them in a FOOD PROCESSOR with 1 tbsp oil and 2-4 tbsp water into a smooth sauce.
  • Alternatively, skip the bell pepper. Chop all other ingredients finely, and stir them together with 1 tbsp oil and a bit of water until it’s a smooth sauce
  • Season to taste with salt & pepper and 1 tbsp vinegar or more.

Arepas

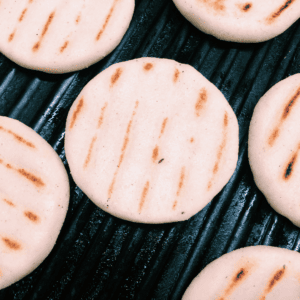
For a most authentic Venezuelan dinner experience, arepas are a key side dish. These fried corn breads are very popular filled with potato or chicken salad, and just anything that you would put on a sandwich. 

Arepas are made from a special type of corn flour. The most popular brand is P.A.N. If you found the right one, it will have the instructions on the back. You mix the corn flour with water and a dash of salt. Then, form the arepas in the size of a burger patty. 

Arepas are fried or grilled and then filled with the complete dish or added as a type of bread on the plate.


Venezuelan Arepas on grill

Tip: Make sure that the patties are smooth on the outside. If they are dry a crack, add a bit more water to the flour.

Fried Plantains

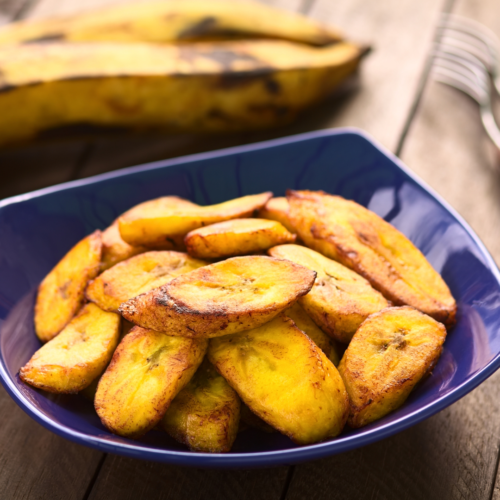
Ripe Plantain

It’s important to select a ripe plantain at the grocery store. Otherwise, it is hard to peel and you have to cut off most of the fruit. Here are some tips:

  • See: The darker the skin, the riper the plantain. It’s normal for a ripe plantain to have some black spots.

  • Feel: Press your finger into the skin. It should feel soft without much resistance.

  • Smell: A ripe plantain should have a sweet, fruity aroma, not sour or musty.

Cut the plantain into large slices. Fry them in hot oil. Drain them on a paper towel. Finally, sprinkle them with salt to taste.

Venezuelan Pabellón Criollo

Venezuelan Pabellón Criollo

SpiceBreeze
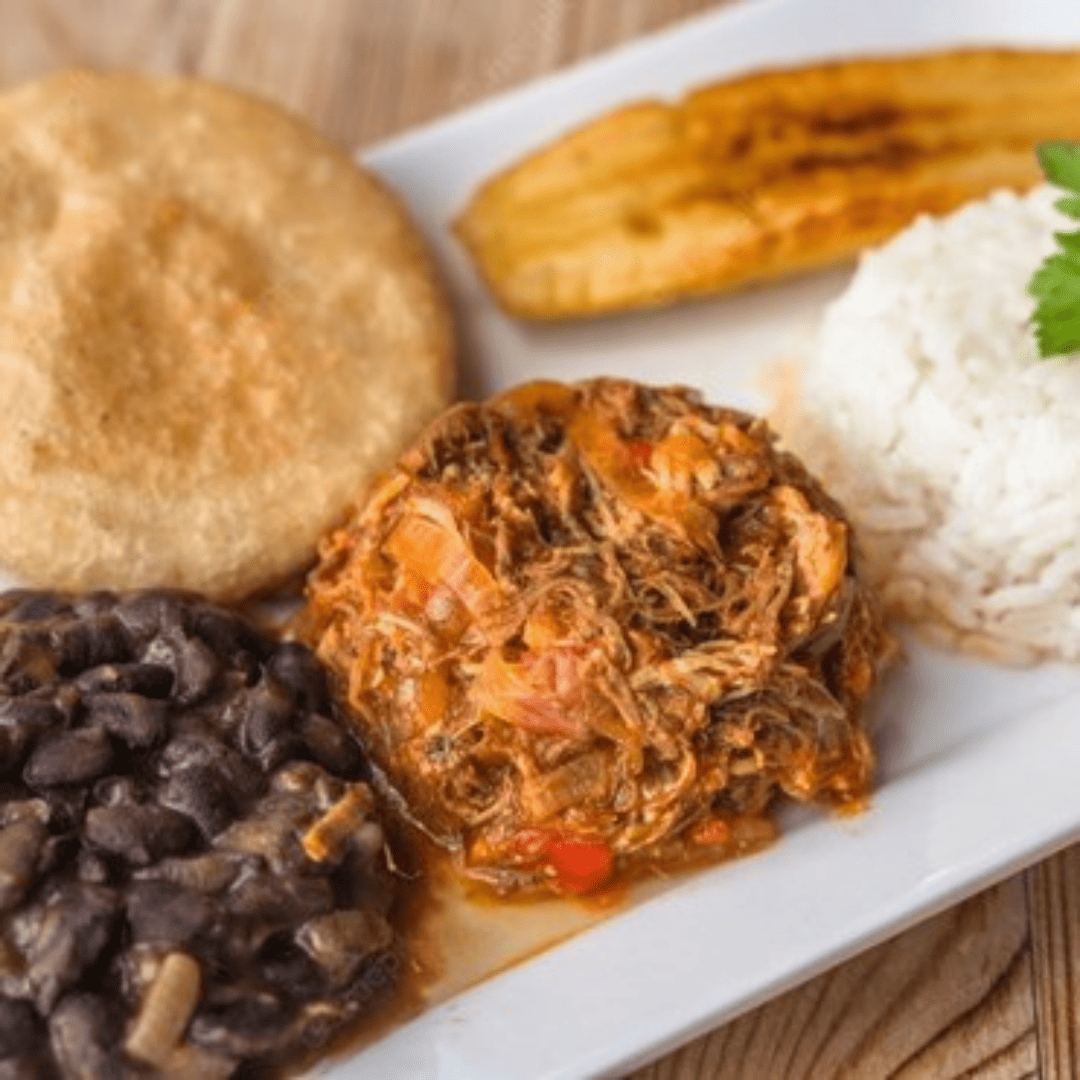
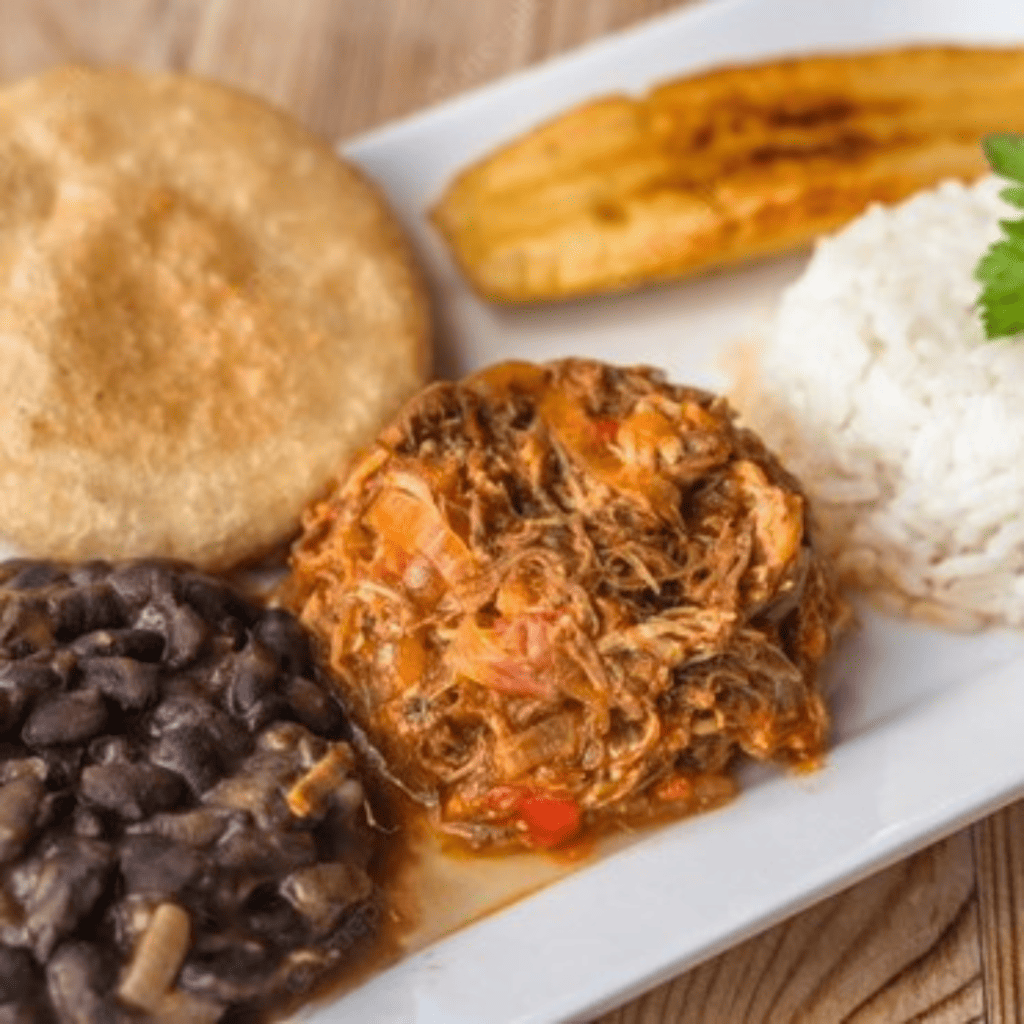
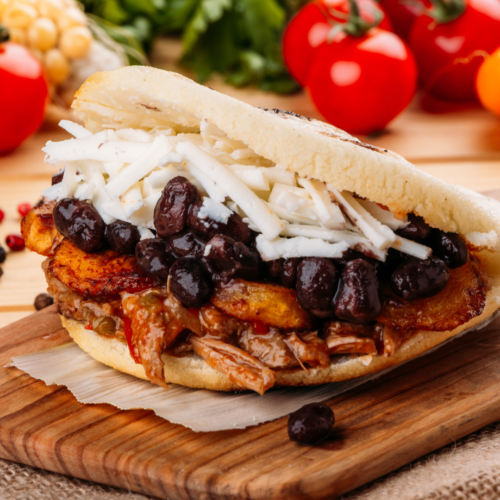
Pabellón Criollo, widely regarded as Venezuela's national dish, holds a cherished place in the country's history and culture. A staple at family gatherings and community celebrations, this dish is as flavorful as it is meaningful. The preparation begins with juicy meat that is slow-cooked to tenderness, then shredded and sautéed with aromatic fried onions, garlic, and bell peppers. Traditionally, Pabellón Criollo is served alongside fluffy rice, savory black beans, and sweet fried plantains, with a variety of optional accompaniments to enhance the experience.
hands-on time 30 minutes
Course Main Course
Cuisine Venezuelan
Servings 3

Ingredients
  

Protein

  • 1.5 lbs beef flank or skirt steak *

Fresh Produce

  • 2 onions 1 quartered, 1 finely chopped
  • 2-3 cloves garlic grated or pressed
  • 1 red bell pepper finely chopped

Packaged Goods/Staples

  • 1/2 cup tomato puree unseasoned **
  • oil
  • salt & pepper

Pabellón Criollo Culinary Spice Kit

  • Annatto, cumin, lime and orange peel, paprika, oregano

Suggested Sides & Toppings

  • black beans see recipe link in notes
  • white rice see recipe link in notes
  • fried plantains see recipe link in notes
  • sunny side up eggs
  • avocado slices
  • any mild crumbled or shredded cheese
  • chopped cilantro

Instructions
 

Cook the meat

  • In a POT, bring 2 quarts of water to a boil.
  • Add meat, 1 onion (quartered), and salt & pepper to taste.
  • Return to a boil. Cook over medium-low heat until the meat is tender.
  • Take the meat out and let it cool. Reserve the broth.
  • Pull the meat apart with a fork or by hand.

Fry & Finish the dish

  • In a large PAN, heat 2 tbsp oil.
  • Fry 1 onion (finely chopped) until translucent.
  • Add garlic and bell pepper.
  • Fry for about 5 minutes.
  • Add Pabellón Criollo spices. Mix well.
  • Add salt to taste.
  • Add tomato puree and 2 cups of the reserved broth.
  • Mix well. Add pulled meat. Mix well.
  • Add salt to taste.
  • Cover and cook over low heat for 15 minutes.
  • Occasionally, check the liquid and add broth if necessary.

Serve

  • Serve with rice, beans, and fried plantains, or your preferred sides and toppings.
  • Enjoy!

Notes

* Substitute beef with pork butt or shoulder or with chicken breasts or thighs.
** Tomato puree can be substituted with 1-2 finely chopped tomatoes and 1-2 tsp tomato paste.
*** Recipes for side dishes & sauces
Caribbean rice and beans
Fried plantains (see above this recipe)
Caribbean green seasoning
Guasacaca sauce (see above this recipe)
Arepas (see above this recipe)
Japanese Sushi

Japanese Sushi Variations

Japanese
Sushi Variations

There is so much more

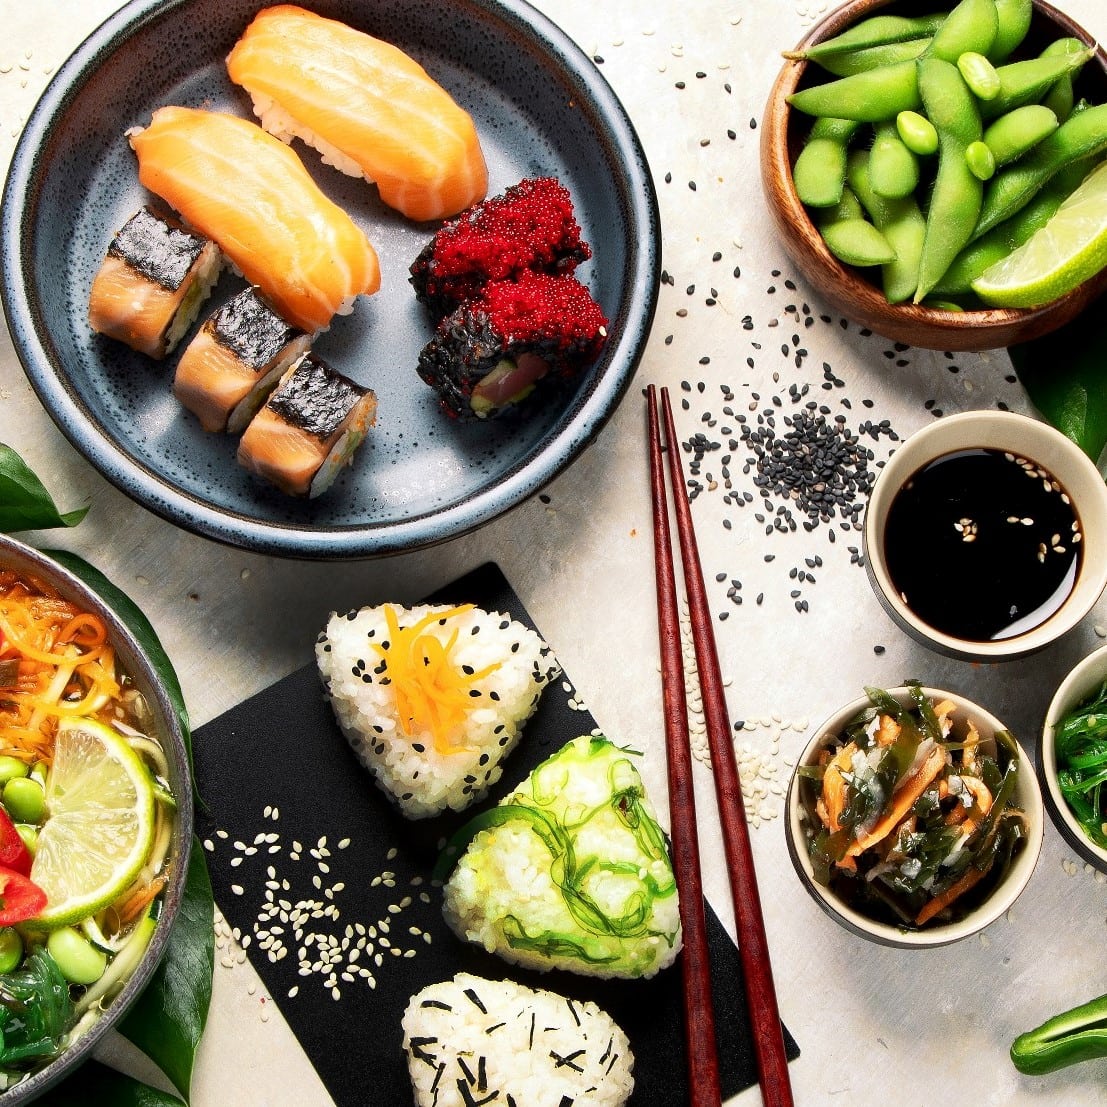
Originally, sushi was a method of preserving fish in rice and salt. But sushi is not just about fish. Our recipe is good with or without fish.

While the rice remains, everything else is up to your taste and imagination. There are more forms than nigiri and maki sushi, for instance, onigiri and chirashi.

Sushi Spice Blend

Hemp seeds, ginger, matcha, coriander, brown mustard

Japanese Sushi

Share

Sushi Rice is Unique

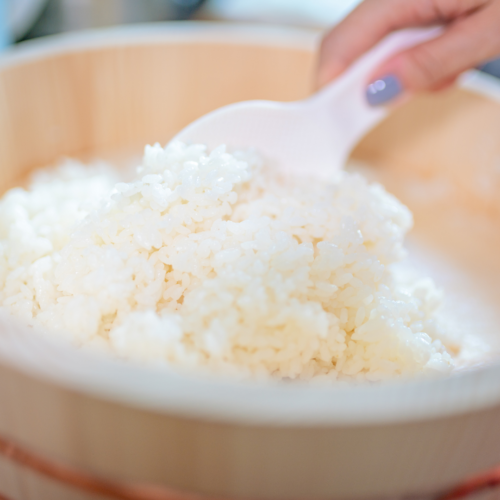
Sushi rice is a type of short-grain rice that is commonly used in Japanese cuisine to make sushi. What makes sushi rice special is the way it is prepared.

The first step in making sushi rice is to wash the rice thoroughly to remove excess starch and other impurities. After washing, the rice is soaked for about 30 minutes to allow it to absorb water. This step is important because it ensures that the rice cooks evenly and retains its shape when it is formed into sushi. 

A combination of vinegar, sugar, and salt is added to the rice after it has been cooked. This helps to give the sushi rice its distinctive flavor and texture. The seasoning also helps to keep the rice moist and sticky, which is important for forming the rice into sushi rolls. This stickiness allows the rice to hold its shape and keep the ingredients inside the sushi roll from falling out.

More Asian Recipes

The current query has no posts. Please make sure you have published items matching your query.

Japanese Onigiri

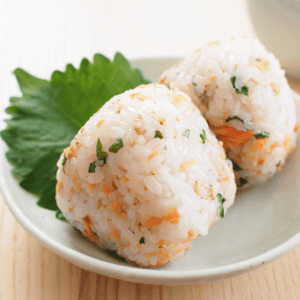
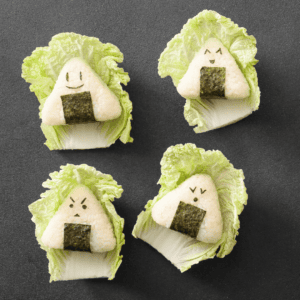
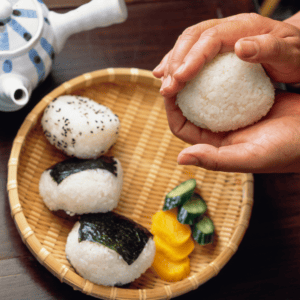
Japanese onigiri is a popular snack food in Japan that consists of a rice ball formed into a triangular or round shape, often with a filling or seasoning in the center. The word “onigiri” translates to “rice ball” in English. The rice is shaped by hand or with the help of a mold into the desired shape.

Onigiri can be eaten on their own as a snack, or as a part of a meal. They are often wrapped in nori (dried seaweed) to make them easier to handle, and to add a salty, umami flavor. The filling inside the onigiri can vary, and may include things like pickled plums, salmon, tuna, beef, chicken, or vegetables.

Onigiri is a popular food item in Japan and is commonly found in convenience stores, train stations, and other locations where people are looking for a quick and easy snack. It is also a popular item for picnics and bento boxes.

Japanese Chirashi

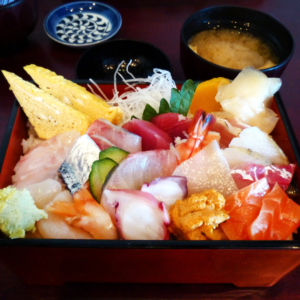
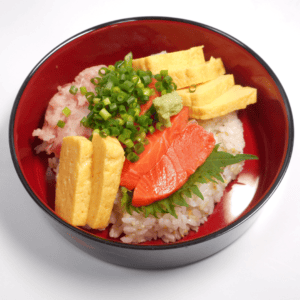
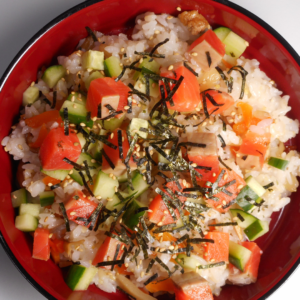
Japanese chirashi is a type of sushi that consists of a bed of sushi rice, topped with a variety of ingredients. The word “chirashi” translates to “scattered” in English, which refers to the way the toppings are scattered on top of the rice.

Unlike traditional sushi rolls, chirashi is served in a bowl rather than rolled into a cylindrical shape. The toppings can vary depending on the chef’s preference, but commonly include fish such as salmon, tuna, and yellowtail, as well as seafood like octopus and shrimp. Vegetables such as cucumber, avocado, and daikon radish may also be added, along with toppings like egg omelet and pickled ginger.

Chirashi is a popular dish in Japan and can be found in sushi restaurants, as well as in Japanese-style bento boxes. It is a colorful and visually appealing dish, and the variety of toppings makes it a great option for those who enjoy a mix of different flavors and textures in their food.

 
Japanese Sushi

Japanese Sushi Variations

SpiceBreeze
This recipe is good with or without fish. | Originally, sushi was a method of preserving fish in rice and salt. While the rice remained, everything else is up to your taste and imagination. There are more forms than nigiri and maki sushi. Meet Onigiri, mixed or stuffed rice balls, and chirashi, where everything is mixed or layered in a bowl. Our unique Sushi blend, with a hint of ginger, substitutes sesame with allergen friendly hemp seeds. Matcha adds a tea flavor similar to ochazuke.
hands-on 3 minutes
Course Main Course
Cuisine Japanese
Servings 3

Ingredients
  

Sushi Rice Ingredients

  • 2 cups short-grain rice
  • 1/4 cup rice vinegar or white wine vinegar
  • 2 tbsp sugar or to taste
  • 1/2 tsp salt or to taste 

Sushi Culinary Spice Kit

  • Hemp seeds, ginger, matcha, coriander, brown mustard

Sushi Filling Selection

  • cucumber, carrots, celery, beetroot, radish, daikon, green onions, avocado, mushrooms
  • sushi grade or smoked tuna or salmon
  • omelet or fried chicken nuggets
  • tofu or tempeh

Suggested Sides & Accompaniments

  • baked salmon
  • fried or baked kale chips
  • seaweed cut seaweed sheets into strips
  • soy sauce
  • pickled ginger
  • wasabi
  • edamame

Instructions
 

Sushi Rice

  • Cook rice according to package instructions*.
  • In a small BOWL**, add vinegar, sugar, and salt. Stir until the sugar and salt are dissolved. Add Sushi spices. Stir.
  • In a large BAKING DISH, spread the rice out. Sprinkle the vinegar mixture onto the warm rice and mix it carefully. Cover the rice with a damp kitchen towel to keep it moist & warm.

Onigiri - with finely chopped fillings

  • Use a bowl with water to wet your hands.
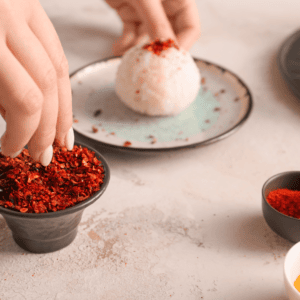
  • Option 1: Fill one hand palm with rice to form a ball or triangle or shape of your liking. Push 1 tsp of fillings of your choice into the rice, close it, and press light on all sides. Repeat.
  • Option 2: Mix 2 tbsp of rice with 1 tsp of
  • fillings of your choice. Form the mixture into your preferred shape. Repeat.

Chirashi - with thinly sliced fillings

  • Fill your BOWL with a layer of rice. Arrange your choice of fillings nicely on top.
  • Find more tips online! Enjoy!

Notes

* Alternatively, in a POT, add rice with 2.5 cups of cold water. Cover. Let it soak for 20 minutes. Bring to a boil. Reduce heat to low and cook for 15 minutes or until water is absorbed. Let it stand for 10 minutes.
** Optionally, heat vinegar up but don't bring it to a boil.
French Canard a l'Orange

French Canard à l’Orange

French
Canard à l'Orange

A Variation with Roasted Chicken
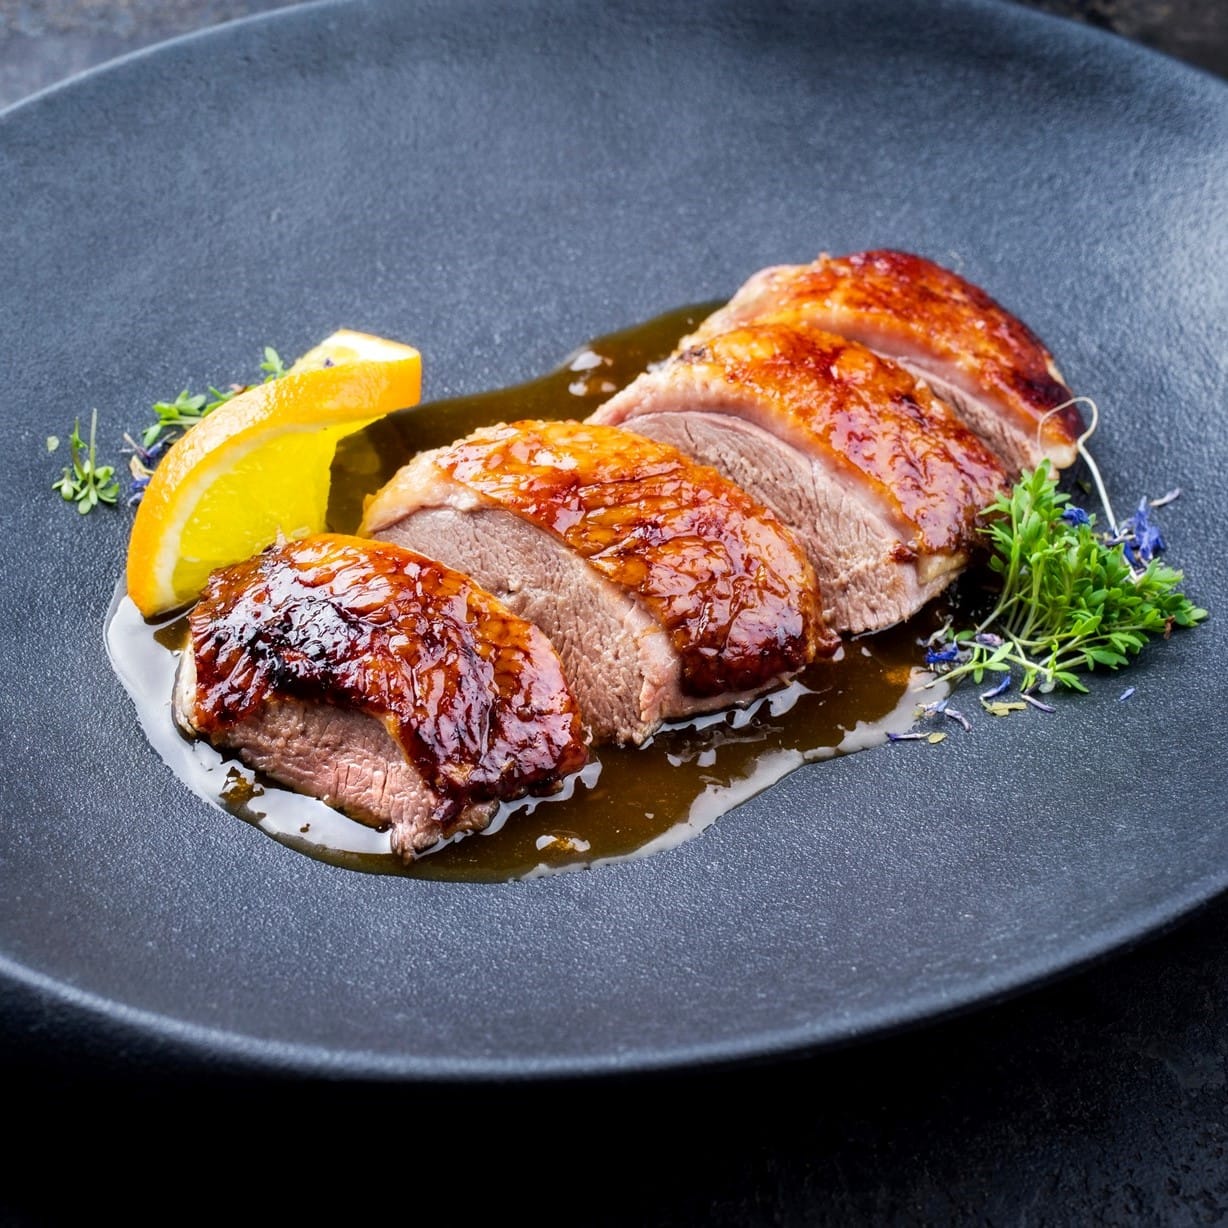
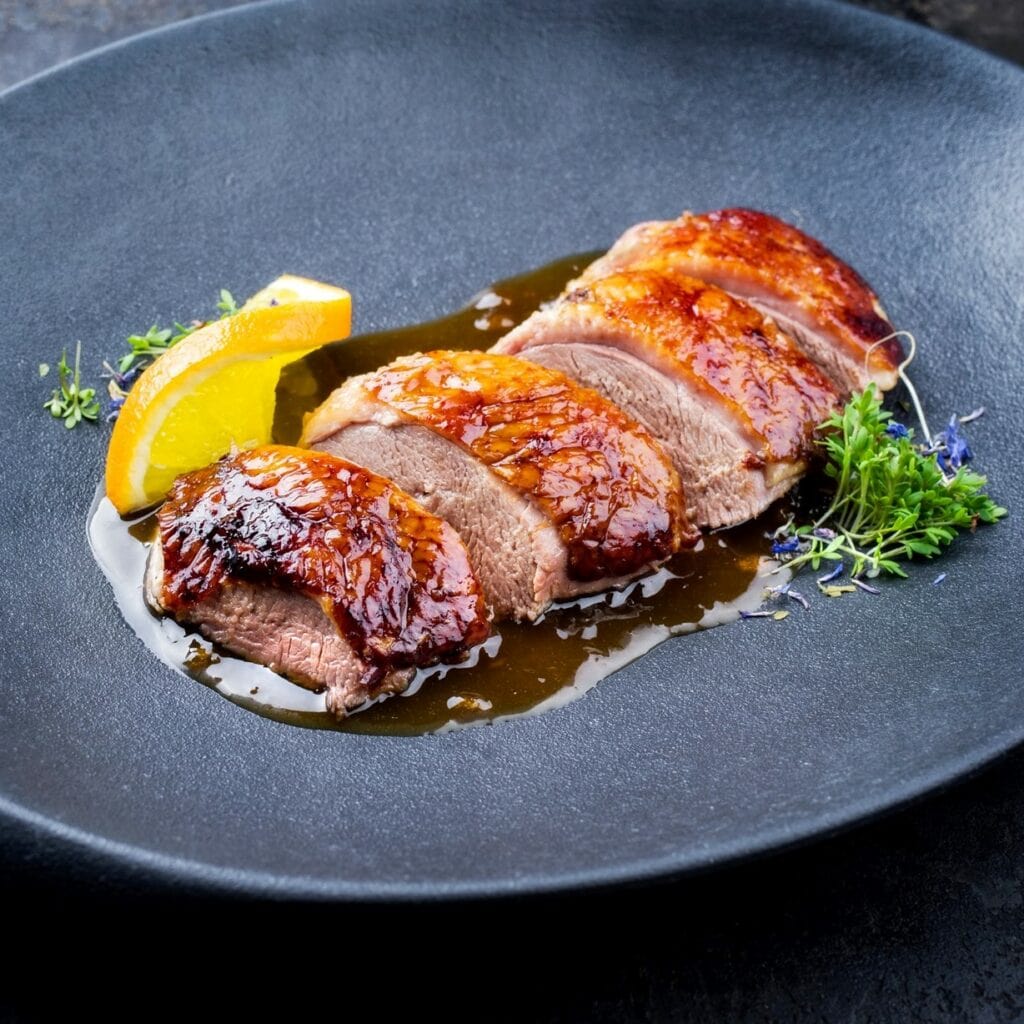
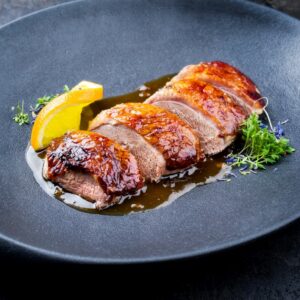
Canard à l’Orange is a French classic roasted duck with an orange based sauce.

Our recipe is for chicken instead of duck, and adds herb seasoning with citrus notes.

The caramel-like, dark orange sauce with a sweet and bitter taste is achieved by slowly cooking orange juice with vinegar and sugar.
Canard à l’Orange Spice Blend

Thyme. oregano, basil, rosemary, sage, lemon verbena, orange peel, lemon peel, tangerine peel, fennel, marjoram

French Canard a l'Orange

Share

More French Recipes

The current query has no posts. Please make sure you have published items matching your query.
French Canard a l'Orange

French Canard à l'Orange

SpiceBreeze
Canard à l'Orange, a French classic of roasted duck in an orange-based sauce, gets a twist with our chicken version, enhanced by herb seasonings and citrus notes. The rich, caramel-like sauce, with its perfect balance of sweet and bitter, is created by slowly simmering orange juice with vinegar and sugar.
hands-on time 30 minutes
Course Main Course
Cuisine French
Servings 3

Ingredients
  

Protein

  • 2 lbs chicken thighs with bones and skin

Fresh Produce

  • 1/2 cup orange juice freshly pressed

Packaged Goods/Staples

  • 1/4 cup balsamic vinegar
  • 2 tbsp brown sugar
  • 1.5 cup chicken broth
  • oil
  • salt & pepper

Canard à l'Orange Culinary Spices

  • Thyme. oregano, basil, rosemary, sage, lemon verbena, orange peel, lemon peel, tangerine peel, fennel, marjoram

Optional

  • 1 cup fresh orange slices without skin chopped

Suggested Sides

  • cooked red cabbage or brussels sprouts
  • mashed potatoes, potato dumplings, or gnocchi

Instructions
 

Dark Orange Sauce

  • In a small POT, add vinegar, juice, and sugar.
  • Cook over low heat until it thickens. Stir occasionally.
  • Add broth and mix well.
  • Optionally, add fresh orange pieces.
  • Cook over low heat for 5 minutes.

Chicken

  • Keep the chicken at room temperature for about 15 minutes.
  • Cut 2-3 short (about 1 inch) slices into the chicken skin.
  • Season both sides with salt and pepper to taste.
  • In a PAN, heat 2 tbsp oil over high heat.
  • Fry the chicken on both sides until they are browned.
  • Transfer it with the liquid to an oven safe dish.
  • Sprinkle both sides with Canard à l'Orange spices.
  • Heat OVEN to 380°F.
  • Roast chicken for about 10 minutes on each side until the internal temperature reaches 165°F.
  • Let it rest for at least 5 minutes. In the meantime, heat up the orange sauce.

Serve

  • Serve the chicken with the orange sauce and your preferred sides.
  • Enjoy!

Notes

  • Substitute chicken thighs with chicken breast or legs, duck breast, or sea bass.
  • Serve the dark orange sauce with roast beef or with roasted vegetables and add the Canard a l'Orange spices to the vegetables or a salad dressing.
  • Repeat the recipe without Canard a l'Orange spices.
Eating Khachapuri

Georgian Khachapuri Cheese Bread

Georgian Khachapuri

Georgian Khachapuri Cheese Bread

The preparation of this delicious Georgian cheese bread khachapuri is only recommended to avid bakers.

But there is a shortcut option. You can buy fresh premade pizza dough and skip the dough ingredients and preparation.

Ingredients

Starter Dough

  • 1/4 cup warm water
  • 1/2 packet active dry yeast
  • 1/2 teaspoon sugar

Dough

  • 1/2 tsp salt
  • 1/2 cup warm milk
  • 1 tbsp vegetable oil
  • 1 medium egg, whisked
  • 3 cups all-purpose flour

Filling

  • 10 oz hard mozzarella [*1] or provolone cheese, shredded
  • 5 oz crumbled feta cheese
  • 1/3 cup water
  • 2 medium eggs
  • 2 tablespoons unsalted butter

Instructions

Prepare the Dough [*2]

  • In a large BOWL, add the ingredients for the starter dough and mix well. Let it stand for 10 minutes.
  • To the BOWL, add 1/2 tsp salt and all liquid ingredients. Mix well.
  • Add 2.25 cups of flour one cup at a time and mix well.
  • Transfer the dough to a lightly floured surface. Knead for about 3-5 minutes until the dough is smooth and elastic.
  • Transfer the dough to a lightly greased BOWL. Cover loosely with plastic wrap or kitchen towel. Let it sit in a warm place for about 45-60 minutes until it doubled in size.

Prepare the Filling

  • In a BOWL, mix the cheese. Then add the water and mix well.

Finish the Khachapuri

  • Half the dough and quarter the filling.
  • On a lightly floured surface, roll out one part of the dough into a round shape.
  • Place one quarter of the filling onto the flat dough.
  • Form the khachapuri shape by rolling in two opposite sides of the circle until only 1/3 of the circle remains uncovered in the middle.
  • Next pinch the open ends together to get the authentic khachapuri form.
  • For a video demonstration of the forming, please click here:
    Forming the khachapuri
  • Fill the uncovered center with another quarter of the filling.

Bake the Khachapuri

  • Preheat OVEN to 450°F.
  • Place khachapuri on a greased baking sheet. Bake for about 10-15 minutes until the crust turns slightly brown. Take it out.
  • With a spoon, make a small hole in the center, just big enough to fit one egg yolk. Add the egg yolk.
  • Return the khachapuri to the OVEN for another 2 minutes. Take it out.
  • Grease the crust with some butter. Place 1/2 tbsp of butter on each vertical side of the egg into the cheese.

Serve

  • When serving, mix the butter and egg into the still warm cheese.

Eating Khachapuri

Notes

  1. You can make the dough in a food processor.
  2. Mozzarella cheese: not the original fresh mozzarella but the hard mozzarella cheese

Enter the Culinary World

Be Inspired | Explore your boundaries and creativity

Georgian Khachapuri

Georgian Khachapuri Cheese Bread

The preparation of this delicious Georgian cheese bread khachapuri is only recommended to avid bakers.

But there is a shortcut option. You can buy fresh premade pizza dough and skip the dough ingredients and preparation.

Ingredients

Starter Dough

  • 1/4 cup warm water
  • 1/2 packet active dry yeast
  • 1/2 teaspoon sugar

Dough

  • 1/2 tsp salt
  • 1/2 cup warm milk
  • 1 tbsp vegetable oil
  • 1 medium egg, whisked
  • 3 cups all-purpose flour

Filling

  • 10 oz hard mozzarella [*1] or provolone cheese, shredded
  • 5 oz crumbled feta cheese
  • 1/3 cup water
  • 2 medium eggs
  • 2 tablespoons unsalted butter

Instructions

Prepare the Dough [*2]

  • In a large BOWL, add the ingredients for the starter dough and mix well. Let it stand for 10 minutes.
  • To the BOWL, add 1/2 tsp salt and all liquid ingredients. Mix well.
  • Add 2.25 cups of flour one cup at a time and mix well.
  • Transfer the dough to a lightly floured surface. Knead for about 3-5 minutes until the dough is smooth and elastic.
  • Transfer the dough to a lightly greased BOWL. Cover loosely with plastic wrap or kitchen towel. Let it sit in a warm place for about 45-60 minutes until it doubled in size.

Prepare the Filling

  • In a BOWL, mix the cheese. Then add the water and mix well.

Finish the Khachapuri

  • Half the dough and quarter the filling.
  • On a lightly floured surface, roll out one part of the dough into a round shape.
  • Place one quarter of the filling onto the flat dough.
  • Form the khachapuri shape by rolling in two opposite sides of the circle until only 1/3 of the circle remains uncovered in the middle.
  • Next pinch the open ends together to get the authentic khachapuri form.
  • For a video demonstration of the forming, please click here:
    Forming the khachapuri
  • Fill the uncovered center with another quarter of the filling.

Bake the Khachapuri

  • Preheat OVEN to 450°F.
  • Place khachapuri on a greased baking sheet. Bake for about 10-15 minutes until the crust turns slightly brown. Take it out.
  • With a spoon, make a small hole in the center, just big enough to fit one egg yolk. Add the egg yolk.
  • Return the khachapuri to the OVEN for another 2 minutes. Take it out.
  • Grease the crust with some butter. Place 1/2 tbsp of butter on each vertical side of the egg into the cheese.

Serve

  • When serving, mix the butter and egg into the still warm cheese.

Eating Khachapuri

Notes

  1. You can make the dough in a food processor.
  2. Mozzarella cheese: not the original fresh mozzarella but the hard mozzarella cheese

Georgian Chakhokhbili

Georgian Chakhokhbili

Georgian Chakhokhbili

Georgian Chakhokhbili

SpiceBreeze
Chakhokhbili is a classic Georgian one-pot stew featuring chicken, onions, and tomatoes. Traditionally prepared with pheasant (“khokhobi”), this flavorful dish is seasoned with the renowned khemli suneli spice blend, a fragrant mix of coriander, mint, turmeric, savory, and fenugreek seeds and leaves (methi). For an authentic touch, we highly recommend pairing it with Georgian cheese bread, khachapuri.
hands-on time 30 minutes
Course Main Course
Cuisine Georgian
Servings 3

Ingredients
  

Protein

  • 2 lb chicken [1] thighs or legs bone-in

Fresh Produce

  • 2 medium onions  chopped
  • 1-2 red bell peppers diced (optional)
  • 1 lb tomatoes chopped [2]
  • 2-4 tbsp chopped fresh herbs [3]
  • 1-3 cloves garlic pressed or grated (optional)
  • 1-2 fresh chilies finely chopped (optional)

Packaged Goods/Staples

  • olive oil
  • salt & pepper

Chakhokhbili Culinary Spice Kit

  • coriander, fenugreek, mint, paprika, black pepper, turmeric, methi, savory, basil, cinnamon, cloves

Suggested Sides

  • any flat bread or Georgian khachapuri [4]
  • cooked or steamed rice

Instructions
 

  • Season chicken with salt & pepper to taste.

Cook

  • In a large POT, heat 2 tbsp oil over medium heat.
  • Add chicken and fry until it turns brown on all sides. Scoop it out and set aside.
  • In the same POT, add onions and optionally bell pepper.
  • Fry over medium heat until the onions turn golden.
  • Add tomatoes and Chakhokhbili spices. Mix well.
  • Season with salt & pepper to taste. Return chicken. Mix well. Cover.
  • Bring to a boil. Cook over medium heat for 30-60 minutes until the chicken falls apart. Stir occasionally.

Add to taste:

  • fresh herbs, and
  • optionally garlic and/or fresh chilies.
  • Cook for another 5 minutes.

Notes

[1] Substitute: lamb chops or loin. Cook 90-120 minutes.
[2] Substitute: 2 cups tomatoes (whole, chopped, or puree), unseasoned.
[3] Your choice of: parsley, mint, basil, or cilantro.
[4] Khachapuri recipe.
 

Georgian Dishes

Georgian chakhokhbili
Georgian lobio
Georgian chashushuli
Georgian ajapsandali

Enter the Culinary World

Be Inspired | Explore your boundaries and creativity

European Schupfnudeln

German-Austrian Schupfnudeln Variations

European Schupfnudeln

German-Austrian Schupfnudeln

SpiceBreeze
Around 1630, German soldiers rolled finger-sized noodles from their ration of flour and water. Today, Swabians usually fry Schupfnudeln with sauerkraut and bacon, served at every festival and market. Austrians love the Schupfnudeln with poppy seeds and sweet fruits. Italian gnocchi are identical to Schupfnudeln, just in a different shape. Our recipe gives you all the options, including substitute vegetables for sauerkraut.
 
hands-on time 30 minutes
Course Main Course
Cuisine Austrian, German
Servings 3

Ingredients
  

Protein

  • 4 oz bacon [1] cut into 1/2 inch strips

Fresh Produce

  • 1 medium onion finely chopped
  • 8 oz green cabbage or baby broccoli [2] cooked

Packaged Goods/Staples

  • 12 oz gnocchi [3]
  • 12 oz dried prunes [4] pitted
  • sugar or other sweetener
  • salt & pepper

Alternative: Mohnbutter

  • 4 tbsp butter
  • 1-3 oz ground poppy seeds
  • 2 tbsp powdered sugar optionally

Instructions
 

  • In a PAN, fry bacon strips over medium heat until crisp. Scoop them out. Set aside.
  • Add onions. Fry 5 minutes.
  • Add gnocchi. Fry 5 minutes.
  • Add vegetables and return bacon.
  • Heat until all ingredients are hot.
  • Season with salt & pepper to taste.
  • Serve the compote (see below) for dessert.

Alternative: Mohnbutter

  • Cook gnocchi according to package directions.
  • In a PAN, melt 4 tbsp butter. Lightly roast poppy seeds and optionally Mohnbutter spices. Add gnocchi and toss to reheat.
  • Serve with a side of prunes compote.
  • Optionally, sprinkle with powdered sugar.

Compote

  • In a POT, add prunes and 2 cups of water.
  • Add sweetener and Schupfnudeln spices to taste. Cover and cook over low heat for about 30 to 60 minutes until the prunes softened to your taste and the sauce thickened. Add water if necessary. Enjoy!

Notes

[1] Substitute bacon with small diced pancetta.
[2] Substitute vegetables with 12 oz sauerkraut.
[3] Substitute gnocchi with homemade Schupfnudeln (recipe) or cooked thick pasta (recipe & tips online).
[4] Substitute dried prunes with fresh plums or apples: reduce the water to 1/8 cup.

Enter the Culinary World

Be Inspired | Explore your boundaries and creativity